Launched from Reid Hoffman’s living room in May 2003, LinkedIn has grown to be the world’s largest professional networking site with over 1 billion users worldwide.
Among them are tens of thousands of UK-based financial advisers and planners hoping to turn casual connections into meaningful business opportunities.
But being on LinkedIn is one thing. Using it effectively is another.
If you can master the four basics we’re about to discuss and stay consistent with them, LinkedIn is abundant with opportunities. It’s a place to:
- Nurture your existing clients with regular touchpoints
- Discover more of the people you want to work with
- Ensure you and your business stay front of mind
- Position yourself as a go-to expert in your field.
Unfortunately, many financial advisers and planners:
- Haven’t taken the time to set up their personal profile effectively
- Aren’t posting targeted, value-adding content on a regular basis
- Fail to send connection requests to potential clients every week
- Ignore the value of engaging with content posted by others.
So, in this definitive guide, you’ll discover the tools you need to use LinkedIn effectively, enhance your online presence, and convert more visitors to your profile into leads for your business.
We’ll be focusing exclusively on personal profiles as opposed to company pages. While they have their place, the research backs up our own experience: personal profiles tend to see better growth and engagement. We’ll follow up with a blog about company pages shortly and update this guide with a link once it goes live.
This isn’t necessarily something you’re going to read in one go, and has been put together in such a way that you can pick it up and put it down as you need it.
We hope you find it useful!
LinkedIn lingo
Before we get into it, here are a few key terms we won’t be discussing at length, but you’ll find handy to understand when you’re navigating LinkedIn in the future.
1st degree connection
Someone you are directly connected with on LinkedIn – they can view your profile, see your posts in their feed, send you direct messages, and leave you a recommendation.
2nd degree connection
People who are connected to one or more of your connections, but not to you directly. They can view your profile and find out who you’re mutually connected with, but they won’t see your posts in their feed unless one of those mutual connections engages with it. You can’t send them a direct message, only a connection request or InMail.
3rd degree connection
A user who you have no mutual connections with. You’re unlikely to see one another’s posts and, much like with a 2nd degree connection, you can’t send them a direct message, only a connection request or InMail.
Activity
A section of your profile which lists the posts you’ve published, and interactions you’ve made on other people’s posts.
Algorithm
A complex set of rules that create your unique user experience. LinkedIn employs a variety of algorithms each with its own function. For example, one will determine which people to suggest as possible connections, while another decides what content you see in your feed, based on what you, and people similar to you, engage with on the platform. LinkedIn won’t tell us much about their algorithms, but testing by independent experts gives us some idea of how you can use them to your advantage.
Analytics
Found on the far left-hand side of your homepage by clicking “Profile viewers” or “Post impressions”, or “View analytics” underneath any post you’ve shared. You can only view analytics for your own profile or pages you’re an admin of. This gives you information on how well your posts are performing, the growth of your network, and the demographics of the people who make up your audience.
Direct message (DM)
Private chat messages sent and received through the “Messaging” tab.
Dwell time
The amount of time a user spends consuming a piece of content on LinkedIn. The longer the dwell time, the more valuable the algorithm will perceive the content to be. This can affect how much LinkedIn is likely to push the content into the feeds of other members. Higher dwell time = good!
Engagement
Any interaction that a piece of content receives on LinkedIn, including reactions, comments, and reposts. Content with a lot of engagement will be seen as more valuable by the algorithm, and so pushed out to more people’s feeds.
Feed
The stream of post updates (and adverts or sponsored content) that appears on your LinkedIn homepage. This differs for each person, as the algorithm blends updates from people you’re connected with, the content they interact with, and ads that LinkedIn thinks are relevant to you. You can toggle your feed to sort the posts by perceived relevancy or how recently they were posted. You’ll find this option just below the “Start a post” box at the top of your feed if you’re viewing LinkedIn on desktop.
Follower
Following someone allows you to see their posts on your homepage without being connected to them, but the person you’re following won’t see your posts (unless they follow you back) and you can’t send direct messages. By default, you follow your 1st degree connections. When you send a connection request to someone whose primary action is “Follow”, you will start following that person immediately. Even if they deny your request, you will still follow their profile unless you manually unfollow them. You can only have a maximum of 30,000 connections on LinkedIn, but an unlimited number of followers. So, many profiles with large audiences use this feature to continue to grow their network after they hit 30,000 connections. It also allows them to control who can and can’t send them direct messages.
Impression
The number of times a post is visible for at least 300 milliseconds (with at least 50 percent of the post in view) on a LinkedIn member’s device or browser window. Specific, isn’t it?! If you have 100 impressions, this doesn’t mean 100 people have seen your post, as the post could be shown multiple times in the same member’s feed. And, given the low time threshold for an impression to count, an impression is no guarantee the post has been viewed at length.
InMail
Direct messages that are sent to or from members you’re not a 1st degree connection with. InMails are only available to Premium LinkedIn users.
Members reached
Previously, viewing your post analytics would only show you the number of impressions a post had generated which, as outlined above, has never been an accurate indicator of how many people had seen that post. Now, you can see the number of unique users and pages that have viewed your post. It’s also an estimate that doesn’t include repeat views.
Premium
A type of LinkedIn membership that gives users additional features compared with what’s available to those with a free, or Basic, account. There are different types of Premium membership, each offering its own benefits. Personally, we like Premium Business.
Step 1: creating a client-enticing profile
If you don’t yet have a LinkedIn profile, now’s the time to change that.
- Go to the LinkedIn sign-up page by clicking the link
- Type in your first name, last name, and email address
- Choose a strong password when prompted to do so
- Click “Join now” and follow any additional steps.
Once you’ve created your profile, you need to optimise it.
Profile URL
Think of your LinkedIn URL as a website address. When you join, LinkedIn allocates a default string of letters and numbers within your profile URL, such as “abi-robinson-72381ujy3u”.
- Ugly 🚫
- Instantly forgettable 🚫
- Doesn’t help you stand out 🚫
You can easily solve the problem by personalising your URL. It’s a quick and easy way to differentiate yourself from other LinkedIn users and looks far more elegant when sharing the URL with others.
To customise your URL:
- From your LinkedIn homepage, click “Me” and then “View Profile”.
- On the upper-right-hand side, click the pencil next to “Public profile and URL”.
- See “Edit your custom URL” on the right-hand-side? Click the pencil beneath it.
- Type in your preferred URL and, if it’s available, you can then hit “Save”.
The URL can include letters and numbers and be up to 100 characters in length. You can’t use spaces, symbols, special characters, or emojis.
We’d recommend using a combination of your name and your business name, separated with hyphens, such as “abi-robinson-yardstick”.
- Creates a link between you and your business ✅
- Sweating the small stuff enhances your credibility ✅
- The hyphens make it look cleaner and easier to read ✅
Banner image
The banner is the unmissable section right at the very top of your profile, so it’s prime online real estate. Here’s ours as an example:
It’s often overlooked and left as the default you’re given when you sign up, or has been updated to an attractive, yet ineffective, image.
Instead, we recommend putting it to work by including the following in your banner:
- Your logo
- Email address, phone number, and website address
- A short statement showing what you do, and who you do it for
- Social proof – for example, an award, VouchedFor rating, or Google reviews.
To change your banner image:
- From your LinkedIn homepage, click “Me” and then “View Profile”.
- Click the pencil icon in the upper-right corner of your banner image.
- Click “Change photo”, choose your new image, and hit “Apply”.
A few tips:
- For personal profiles, the ideal size is 1584 by 396 pixels.
- Check how your new banner looks on both desktop and mobile.
- Leave the far left-hand side empty, as it will be hidden by your profile picture.
If you’re struggling to create an eye-catching banner, our branding and design team can help. Simply email hi@theyardstickagency.co.uk and we’ll be in touch.
Premium users can now upload up to five banner images which will be shown as a rotating slideshow, with each image appearing on screen for three seconds before changing. You could use this to promote an upcoming webinar, highlight an award you’ve received, or share a client testimonial you’re particularly proud of.
Here’s an additional banner image we used recently:
Profile picture
According to LinkedIn, profiles with a photo get up to 21 times more views than those without. Your photo should be:
- Professional – no holiday selfies with a cocktail please! ✅
- Clear – blurry or fuzzy images do nothing for your credibility ✅
- Zoomed in – it’s a small image, so your face needs to fill most of it ✅
- Bonus points if you incorporate a bold brand colour – it stands out in the feed ✅
To add a new image:
- From your LinkedIn homepage, click “Me” and then “View Profile”.
- Click on your existing picture, “Add photo” and then “Upload photo”.
- Choose your new image and make use of the adjustments, such as “Zoom”, if needed.
- When you’re ready, click “Save photo”.
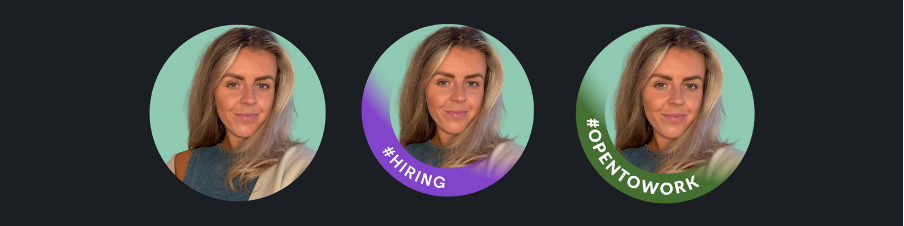
If you click on your profile picture, you’ll notice “Frames” next to “Add photo”. This allows you to advertise that you’re hiring or open to work. If selected, these will be visible to all LinkedIn users.
Name
This might seem like an obvious one, but there’s an opportunity to be had.
As opposed to “Phil Bray”, Phil’s name on LinkedIn is “Phil Bray💡The Financial Services Marketing Guy💡”. Now, whenever he posts or someone tags him in a comment, anyone skim-reading will still know who he is and how he can help them.
- From your LinkedIn homepage, click “Me” and then “View Profile”.
- Click the pencil icon below your banner image on the right-hand side.
- Under “Basic info”, add your specialism after your surname.
- Click “Save”.
If possible, avoid using your job title. “Chartered Financial Planner” is a fantastic accolade but, with thousands of other users who can claim the same, it doesn’t go as far in helping you stand out from the crowd.
Instead, think about who you can help and specifically what you offer. For example:
- “NAME – helping divorcees manage their money” ✅
- “NAME – financial planning for Australian expats” ✅
- “NAME – wealth manager for company directors” ✅
If you do decide to change your name, we’d rather you do so with all the facts, so it’s worth noting that this is technically against LinkedIn’s policy. LinkedIn does not allow members to use pseudonyms, fake names, business names, associations, groups, email addresses, or special characters that do not reflect your real or preferred professional name.
However, in our experience, it’s rarely caused problems and, if needed, removing the suffix is a simple process. One occasion where it would pose an issue is if you decide to “verify” your profile, which we don’t recommend doing anyway. This is because buried in the terms and conditions of the verification process are instructions to take if you would rather LinkedIn didn’t sell or share your personal information. If you don’t follow those steps, who knows where your data might end up!
Headline
Your headline is prominently displayed below your profile picture. It’s one of the first opportunities to grab the attention of a profile visitor, so it’s important you get it right.
Equally, it’s used by LinkedIn to decide your place in the search results, and appears next to your name when someone does search for you, either on Google or LinkedIn.
When you join LinkedIn, your headline is auto-filled with your job title, and many people don’t understand why it’s of benefit to be more descriptive. With 220 characters to play with, you can be much more creative than that!
For example, include your job title, but also explain three key things using terms and keywords your ideal clients might search for:
- What you do
- Who you do it for
- Why people work with you.
To give that some context, a headline Phil often uses is:
“The Yardstick Agency: The UK’s highest-rated financial services specialist marketing agency | Strategy, websites, newsletters, social media & branding | We’ll be your marketing department or support your in-house team.”
And Abi’s is simply:
“I help financial advisers/planners determine their marketing needs | Rising Star of the Year 2024 🧚🏼♀️”
Using a fictitious financial planner working in Oxford, who specialises in supporting partners at law practices, you could say:
“Director @ Chambers Financial | Bespoke financial planning for busy partners of Oxford-based law firms | 30+ 5* Google reviews | 4.9 out of 5 on VouchedFor | While you defend your clients, we’ll protect your wealth 📌”
AI is your friend here! Use a tool such as ChatGPT to feed in this prompt:
“I need to write a new LinkedIn headline that explains what I do, who I do it for, and why people work with me using social proof.
- What I do: bespoke financial planning
- Who I do it for: partners at Oxford-based law firms
- Why people work with me: 4.9 out of 5 on VouchedFor, 30+ 5-star Google reviews
The headline should not exceed 220 characters, but should be at least 205 characters in length. It can include emojis, but do not include more than 2 emojis throughout.
It should be clear, punchy, and speak directly to my ideal client, showing how I can help and how I have helped others like them.
Please can you give me 5 options?”
The results will likely need personalising with your own tone of voice and natural vocabulary, but they should give you a great starting point.
To update your headline:
- From your LinkedIn homepage, click “Me” and then “View Profile”.
- Click the pencil icon below your banner image on the right-hand side.
- You can find your headline under “Basic info”.
- Click “Save”.
We’d recommend using a character checking tool such as this one to ensure you haven’t exceeded the 220 limit.
Contact information
Too many LinkedIn profiles are missing basic contact details, which makes it harder for prospective clients to get in touch or learn more about you.
The contact details on your profile can include:
- Your website address (you can add multiple links, but don’t fall into the trap of choice overload bias – only include sites you really want prospects to visit)
- Telephone number
- Office address
- Email address
- Your birthday.
That last one – your birthday – is another great example of sweating the small stuff. On the day, your connections will receive a notification letting them know it’s your birthday and inviting them to reach out. In our experience, you’ll enjoy a decent amount of engagement, and it could be all the nudge needed for a potential client to get in touch. We’ve known that happen before!
To edit your contact details:
- From your LinkedIn homepage, click “Me” and then “View Profile”.
- Click “Contact info” beneath your headline, and the top-right pencil icon.
- Make the necessary changes and click “Save”.
Providing services
While this is more of a nice-to-have than a need-to-have, it can help you stand out from others by providing an additional way to showcase the services you offer.
The options are pre-determined by LinkedIn and organised into 16 categories, one of which is “Finance”. You can choose up to 10 services, such as “Financial Planning” and “Retirement Planning”.
You can also request a review specifically for one of the services you offer.
To add this section to your profile:
- From your LinkedIn homepage, click “Me” and then “View Profile”.
- Click “Open to” beneath your follower count, and then “Providing services”.
- Browse the categories or use the search bar to find the most relevant option(s).
- Use the free-text “About” box to provide more details about your services.
- Consider adding your work location, pricing, and additional media if relevant.
- Once you’re done, click “Save”.
To update your existing services:
- From your LinkedIn homepage, click “Me” and then “View Profile”.
- Scroll down to your providing services section.
- Click the pencil icon in the top-right-hand corner.
About
The “About” section is your first opportunity to speak at length about who you are, what you do, and how you help your clients. It needs to be a strategic piece of content that makes a brilliant first impression and showcases your professional identity.
Let’s see it as a longer version of the headline. You should include:
- Who you work with
- Your differentiators (there are no USPs in financial services)
- The benefits of working with you (ideally including social proof).
Have a look at the About section of Abi’s profile for an example.
You’ll notice that she has used bold sub-headings to highlight key information and introduce the different sections. Many people will only skim-read your profile, so adding sub-headings is a great way to break up the text and make sure the important bits really stand out.
As LinkedIn doesn’t allow for native formatting options (e.g. bold, italic), we recommend YayText or a similar third-party tool.
One word of caution: YayText uses mathematical characters (or unicode text) to allow for creative formatting, and assistive technologies like VoiceOver have trouble deciphering it. This shouldn’t present a problem for anyone able to read the text on screen, but is worth knowing if you have clients who rely on this sort of technology.
In addition to sub-headings, you can also consider:
- Using emojis, which you can grab from Emojipedia… choose carefully though, you don’t want your profile to mirror a teenager’s Snapchat messages!
- Playing around with spacing and white text – try to avoid big paragraphs without any line breaks, as they’re harder to read at a glance.
Have a look at Phil’s profile to see how he’s used these techniques to optimise his About section.
To update your About section:
- From your LinkedIn homepage, click “Me” and then “View Profile”.
- Scroll down to “About” and click the pencil in the top-right-hand corner.
- Use the free-text box to improve this section.
- You can also add your top skills here if you’d like to.
Featured
This is often overlooked, but it’s an efficient way to showcase your work to people who visit your profile. It provides some visual diversity and, as it sits above the rest of your LinkedIn activity, is a great opportunity to grab attention.
Here’s Abi’s as an example:
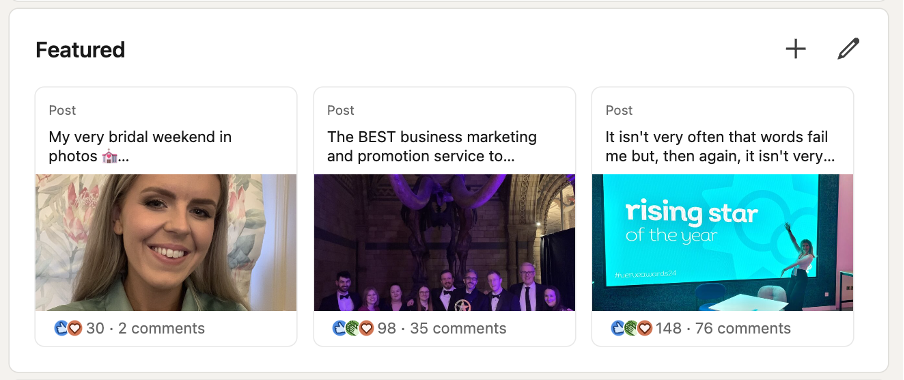
As you can see, she’s chosen to feature her most recent “weekend in photos” post (something she shares every week), a post announcing Yardstick winning ‘Best Business Marketing and Promotion Service to Advisers’ at the FT Adviser Service Awards 2024, and her post about being named ‘Rising Star of the Year’ at the Verve Awards 2024.
Having content pillars, or post themes, is something we’ll cover in the next section, and is a great way to make your content memorable. Equally, showcasing award wins is a brilliant way to put social proof right under your ideal clients’ noses.
And Phil’s:
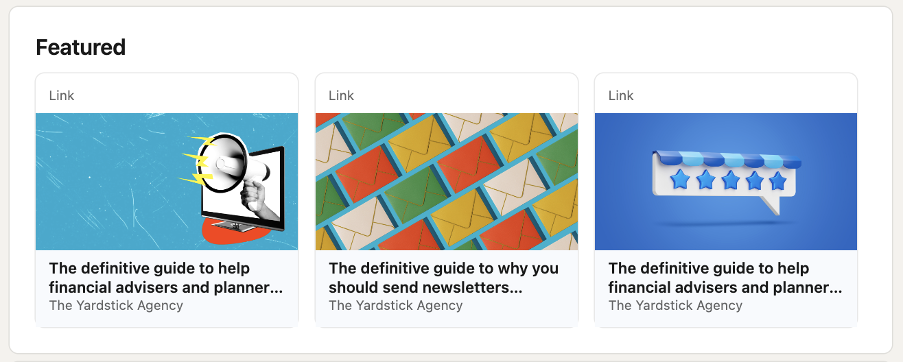
Phil has chosen to promote three of his favourite Yardstick definitive guides (let’s see if this one makes the cut!) with links back to our website. By encouraging a profile visitor to leave LinkedIn and head to your website, you’re cutting down the competition from thousands to one. They can’t get distracted by other LinkedIn content, and they may well stay on your site for a browse after viewing the link in question. Equally, our definitive guides are comprehensive and value-adding. If you share a similarly useful resource, your audience is going to see you as a trusted expert.
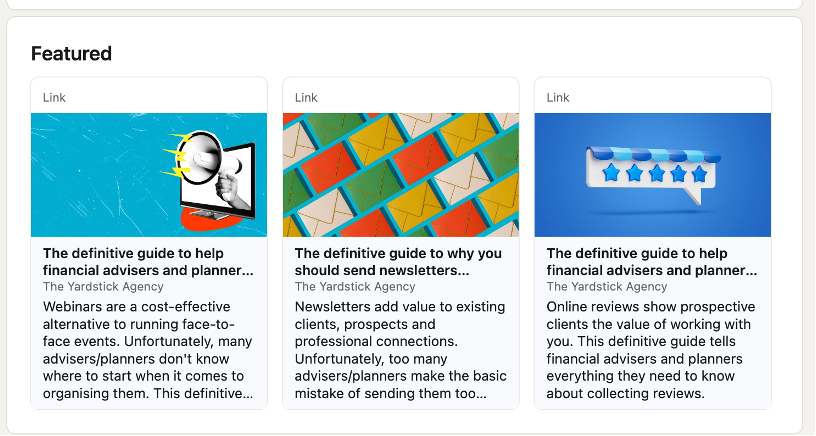
When sharing external links in your “Featured” section, we’d suggest that you don’t add a description to the item. If you do, a profile visitor must click twice (once to open a pop-up about the item to read the description, and again to open the link). Here’s what Phil’s featured section would look like with descriptions:
And this is what appears when you click the first item:
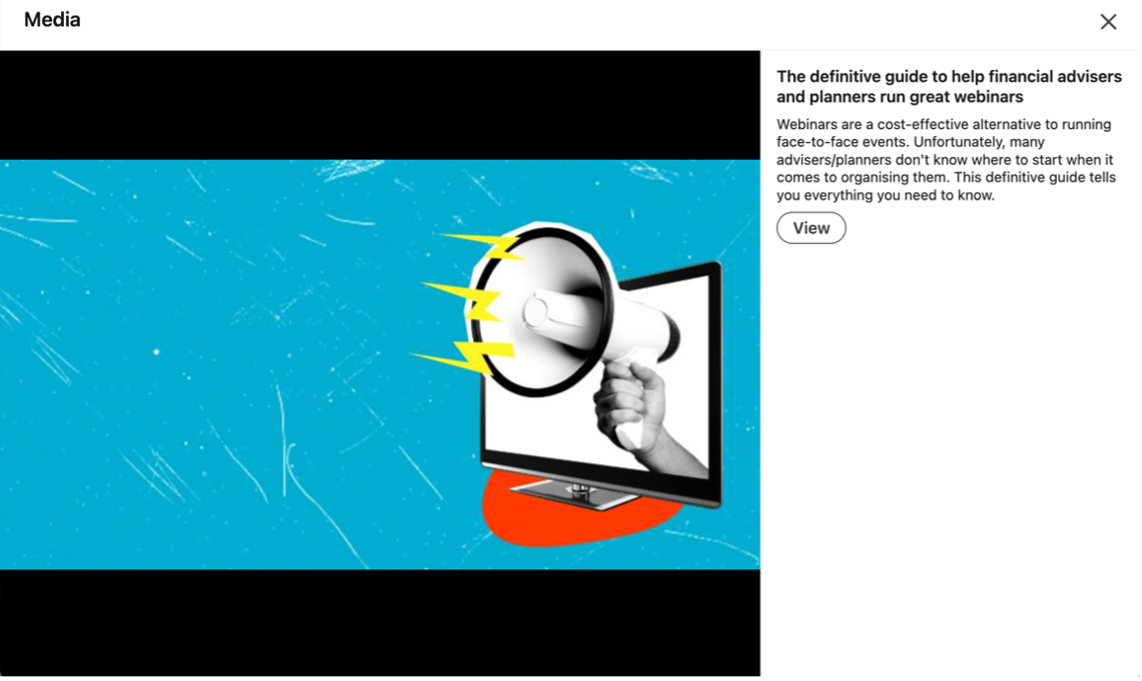
You must then click “View” to navigate to the external link, which feels like an unnecessary extra step to us. Reducing friction to nudge a potential client straight to where you want them to go is surely a good thing!
As you can see, both Phil and Abi have opted for three featured items each. This is our recommendation for you too because, if you include any more than that, a profile visitor will have to scroll to see the other items in this section. In our experience, most people won’t, so focus on the three things you think are most valuable or interesting for your network.
You can add:
- Your latest or best LinkedIn posts
- Articles that you’ve written and published on LinkedIn
- Media including images, documents, and presentations
- Links to your website – for example, your client testimonials page.
If you don’t yet have a featured section on your profile, you will first need to:
- From your LinkedIn homepage, click “Me” and then “View Profile”.
- Click “Add profile section” underneath your follower count.
- Open the “Recommended” drop-down.
- Click “Add featured”.
If you already have this section, and want to add to it:
- From your LinkedIn homepage, click “Me” and then “View Profile”.
- Scroll down to your featured section.
- Click the “+” icon.
- Select the appropriate option and follow the instructions.
To remove or reorder items:
- From your LinkedIn homepage, click “Me” and then “View Profile”.
- Scroll down to your featured section.
- Click the pencil icon in the top-right corner.
- To reorder, click the up and down arrows, and drag and drop accordingly.
- To remove, click “Remove from featured” and confirm your choice.
Activity
This pulls through your latest posts, reactions, and comments, showing how active (or not!) you are on LinkedIn.
There’s nothing for you to edit or change here when you’re building your profile.
Just remember that people who view your profile will make judgements based on what they see you’ve posted, said in comments, or reacted to.
So, keep it professional!
Experience
This is where you list current and previous roles.
Keep it relevant to potential clients who might view your profile and use the section to highlight key achievements in those roles.
Use the same tools and techniques that you did in the About section to make key points stand out for those people who skim your profile.
To make changes:
- From your LinkedIn homepage, click “Me” and then “View Profile”.
- Scroll down to the “Experience” section.
- Click the pencil icon in the top-right-hand corner.
- Edit existing roles or add a new one.
Both the experience and education sections allow you to include links to documents, photos, sites, videos, and presentations, which can be useful to showcase the work you’ve done or things you’ve achieved in a particular role. You can see how Abi has done that at the bottom of her profile under the education section.
Before clicking “Save”, you can choose whether or not to notify your network about the changes you’ve made. If you’re making basic tweaks to your profile, we’d recommend turning this off. However, if you’re changing jobs, leave it on. Just be careful with the timing, you don’t want to announce your new role before the boss knows!
Education
Much like the experience section, keep it relevant. We don’t necessarily need to know about your GCSEs or O-Levels! It’s a great place to highlight higher-level accreditations such as being Chartered, a Fellow, or Accredited.
If you haven’t yet added the Experience section:
- From your LinkedIn homepage, click: “Me” and then “View Profile”.
- Click: “Add profile section”.
- Open the “Core” drop-down.
- Click “Add education”.
Then, to make additions:
- From your LinkedIn homepage, click “Me” and then “View Profile”.
- Scroll down to the Education section.
- Click the “+” icon.
- Complete the sections as required.
Again, you can decide whether or not to alert your network to changes. The same rules apply; if you’re making small amends, they probably aren’t worth announcing. If you’re adding your newly achieved Chartered or Accredited status, they certainly are!
Recommendations
We advocate using Google and VouchedFor to collect your online reviews. However, recommendations on LinkedIn will help to impress potential clients who make it down to the bottom of your profile.
The fact you can’t display ratings and reviews from other platforms on LinkedIn makes recommendations all the more important. That said, we don’t currently see a time when LinkedIn recommendations become more important than Google or VouchedFor reviews.
If you need to add the Recommendations section:
- From your LinkedIn homepage, click “Me” and then “View Profile”.
- Click “Add profile section” beneath your follower count.
- Open the “Recommended” drop-down.
- Click “Add recommendations”.
We’d suggest you start by dropping the person a message to ask if they’re happy to leave you a recommendation. In our experience, that’s always been well-received.
Then, once you have the go-ahead:
- From your LinkedIn homepage, click “Me” and then “View Profile”.
- Scroll down to the recommendations section.
- Click “Ask for a recommendation”.
- Type in the name of the person you are asking for a recommendation and follow the necessary steps.
Your profile is looking good!
If you’ve followed all the steps above, your profile will be:
- Tailored to your ideal clients ✅
- Impressive even at first glance ✅
- Clear about what you offer and who you help ✅
Unfortunately, this alone isn’t going to be enough to convert a profile visitor into a potential client. From here, there are three things you need to do every single week.
Let’s dive in.
Step 2: posting regular, value-adding content
Unsurprisingly, you need to post on LinkedIn consistently if you want to:
- Prove that you’re an expert in your field ✅
- Build relationships with potential clients ✅
- Stand out from your less active competitors ✅
Let’s start with a few general FAQs:
How often should I post?
We recommend a minimum of three, and a maximum of seven, posts a week. This is because research suggests that posting more than once a day negatively impacts both reach and overall engagement. Equally, posting less than three times a week simply isn’t sufficient to keep you front of mind with your audience.
If you’re new to posting regularly, start with three posts a week and build it up over time.
On which days should I post?
Without sounding glib, it depends!
The best day to post is when your ideal clients are most active on LinkedIn, which is going to require a bit of trial and error.
Generally speaking, Tuesday, Wednesday, and Thursday are considered the best days for reach and engagement. However, Phil has bucked the trend with his weekly #neronuggets posts. While weekends are regularly reported as the worst days to post, Saturdays are often Phil’s best days for engagement.
What time should I post?
Assuming you’re posting for a UK audience, so there’s no difference in time zone to worry about, we’ve always found early morning posts – between 7am and 9am – to be the best for engagement.
Again, trial and error will help you determine what works best for you.
Can I schedule my posts?
You can, either by using a third-party scheduling tool like SmarterQueue (you can use our referral link for a double-length free trial) or through LinkedIn itself.
Unlike LinkedIn’s native scheduling feature, SmarterQueue allows you to schedule a comment as well as the post itself, which we’ve found incredibly useful.
Whether to choose to schedule or share posts “live”, it’s important to capitalise on the “golden hour” – the first hour after your post has gone live – by replying to comments and engaging with other content. There’s some research to suggest that the algorithm will push your post out to more people if you do.
What should I post about?
AI is your friend here. Give it a prompt explaining who you are and who your ideal client is (there’s an exercise about this in just a second), and that you’re looking for LinkedIn post ideas. It’ll give you a great starting point.
Equally, going back through your notes from initial meetings with prospects, and review meetings with existing clients, should give you some good ideas.
And you could pick up a copy of Show Your Work by Austin Kleon. It’s a short, highly accessible read that’s packed full of fantastic suggestions.
We have a few blogs that might help too:
- Here’s your winning LinkedIn content plan all wrapped up
- 6 lessons from our LinkedIn polls that’ll improve your marketing
- 12 practical ways to create really engaging LinkedIn posts.
However, if you’re still struggling to come up with ideas, there may be a more fundamental problem: you can’t market to your audience if you don’t understand them.
Without knowing who your ideal clients are, you’ll have no real idea which social channels to prioritise, or what kind of content is going to resonate.
There are four simple steps that support the ideation process:
- Define your ideal client
- Identify their financial challenges
- Understand how they use social media
- Consider their aspirations.
Whether you’re new to posting, or a seasoned social veteran, this is a key exercise that makes a massive difference to the quality of your posts.
Step 1: define your ideal client
Ask yourself:
- Where is the cross-section between people I work best with, and people I love working with? You should identify whether they’re individuals, families, or businesses, and what life stage they’re at.
- What’s their financial situation? It’s important to clarify whether you’d define them as high networth, young professionals, or retirees, for example.
- What’s important to them? Consider which aspects of financial advice/planning are going to be particularly beneficial to them, from reducing tax liability to retiring early. If you’re struggling, consider reviewing your client survey results to see what existing clients enjoy most about the service you provide.
You may have several lists, but try and niche down as much as you can. There are thousands of financial advisers/planners marketing themselves to business owners in London, for example, so any specialism is going to help you stand out. As they say, the riches are in the niches!
Step 2: identify their financial challenges
Ask yourself:
- What financial questions are my ideal clients asking? Make a note of the questions you’re regularly asked by clients and prospects, and you’ll soon have a lengthy list.
- What is stopping them from taking action? Asking potential clients why they haven’t accessed financial advice/planning in the past will help fill in the blanks here.
The answers to these two questions will give you a fantastic foundation for your LinkedIn content, and help you tailor your posts to exactly what potential clients want to know.
Step 3: understand how they use social media
Now, since this guide is specifically about LinkedIn, we’ll assume you’re already fairly certain that’s where your ideal clients are hanging out. However, if you’re targeting young creative types or retirees, consider whether channels like Instagram and Facebook respectively would be more appropriate.
So, it’s worth checking:
- Are my current clients and potential clients active on LinkedIn? Have a nosy around to see if a) they have a profile and b) they’re using it.
- If yes, what content are they engaging with? You can see the content that other LinkedIn users are reacting to and commenting on in their “Activity” section, which can give you a great indication of what they’d like to see from you.
Step 4: consider their aspirations
Helping your ideal clients visualise what their lives will look like after working with you is hugely powerful. So, ask yourself:
- What do my ideal clients want to achieve?
- And what is stopping them from getting there?
With your answers, you’ll be able to generate content (particularly client testimonials) that proves you’ve helped others achieve their aspirations and show that you can help an ideal client navigate the challenges that are preventing them from reaching their goals.
We’re ready to go!
Taking the time to deeply understand your audience ensures that:
- Your LinkedIn content speaks directly to their challenges and aspirations ✅
- You establish yourself as a trusted expert in your specialism ✅
- You focus your efforts on quality interactions ✅
Before we move on, there’s one thing to note.
The LinkedIn algorithm (as with any social media platform) is constantly evolving. As such, there’s little value in us regaling you with advice that suits the algorithm today, as it will likely be different tomorrow.
For more about general FAQs and social media algorithms specifically, you can watch Abi’s interview with Carmen Reichman from FT Adviser as part of their Better Business series.
Our top posting tips
Now we know who we want to attract, here are 10 timeless top tips for a value-adding, engaging posting plan that you’ll be able to stick to:
1. Define your content pillars
These are broad themes that guide your LinkedIn strategy, ensuring every post aligns with your audience’s needs and your goals.
Taking the exercise you’ve just done to understand your clients more deeply, let’s say your ideal client is:
- 25 to 45 years’ old
- A business owner of a technology company
- Based in the Midlands
- Looking to grow their business before exiting in 5 – 10 years
- Keen for an early retirement where they can enjoy their wealth and support the next generation of their family.
And let’s say you’re posting five times a week.
Here’s an example of your content pillars:
- Monday: Client testimonial showing how you’ve helped someone similar
- Tuesday: Education on planning for early retirement/exit planning
- Wednesday: Insights into how technology impacts financial services
- Thursday: Education on tax efficiency and wealth management as a business owner
- Friday: Lifestyle piece – best walks in the Midlands, tips for a work-from-home setup
- Saturday (BONUS): Personal – help them get to know you and the business better.
Every week, you’ll stick to these broad themes, but the content itself will change (as you can see from the two “lifestyle piece” examples we’ve given).
In one week, you’ve proven that you understand who your ideal client is, shown your expertise in their industry, provided valuable educational content, and shared ideas about how they can get more out of their local area.
2. Have your own recognisable style
Unless you have a pretty strict niche like the example above, you can be fairly confident that there are lots of other advisers/planners trying to attract the same clients as you. You’ll be offering similar advice, touching on similar themes, and trying to reach out to similar people.
So, particularly when your ideal client demographics are reasonably broad, you have to latch on to the one thing that is unique: you.
You can do that by:
- Formatting your posts in a specific way (e.g. focusing heavily on listicle-style content like this post, or using the same carousel template regularly – we explain what these are below)
- Incorporating personal and professional stories into your content
- Using “real” photos as opposed to stock images
- Establishing clear content pillars that you stick to week in, week out (for example, Abi’s “weekend in photos” or Phil’s “#neronuggets”)
- Having a personal interest that you talk about regularly.
3. Make your posts about the reader
Thanks to the initial exercise, your content is already going to be highly tailored. Go one step further by using the word “you” in your content. Instead of saying, “many business owners could benefit from knowing this simple trick”, say “you could benefit from knowing this simple trick”.
It’s more engaging for your reader, shows you care specifically about their needs (not those of LinkedIn at large), and fits with another of our top tips…
4. Write like you talk
If you’ve been using AI to write your LinkedIn posts, it’s time to stop.
It’s good for many things, but a start-to-finish piece of content isn’t one of them. Even if you do choose to use AI for a first draft, it will need plenty of editing to make it sound like you.
Writing how you talk gives your posts rhythm, a conversational flow, and makes you appear more approachable.
5. There is no one-size-fits-all post type
Long or short. Carousels or infographics. Single image or video.
The choice can be overwhelming, but it all just depends on what you can be consistent with.
If you’re flying solo managing your LinkedIn profile, you might need to keep it simple with just text and image posts. If you have more time, or someone to outsource to, you could try out some of the other ideas and review the data to see what lands.
And don’t assume that a longer post is going to be more effective than a shorter one. In 2024, one of Phil’s best-performing posts of the year had just 11 words in the caption.
Get in, add value, get out.
Oh, but that post did have one other thing worth mentioning…
6. The image matters, it really matters
How people see you is how they perceive you, so high-quality images are an absolute must for anyone looking to take LinkedIn seriously.
Wherever possible, use your own photos, not stock shots. For one thing, it shows you’ve gone to more trouble than just browsing Shutterstock or Unsplash (effort bias is super powerful). They’re also more genuine and relatable, so it instils a sense of trust. Isn’t that what financial advice and planning are all about?
And, in our opinion, ignore these LinkedIn “gurus” who claim you shouldn’t be posting selfies or photos of yourself on your profile. They call it gratuitous and attention-seeking; we call it authentic and relationship-building.
Ask yourself:
- Is this image visually appealing?
- Does it link to what I’ve said in my post?
- Is it scroll-stopping?
We were half-tempted to put a little ™ next to “scroll-stopping”. For us, this is perhaps the most important metric. If your image isn’t attention-grabbing enough to stop someone’s finger or thumb from scrolling right on by, you need to pick a different one.
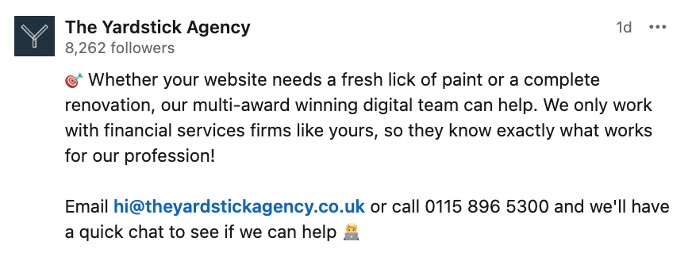
7. Never include an external link within the body of your post
Yes, the link previews look nice. And yes, it does make the link stand out more.
But all of that is irrelevant when you know that including a link within your post can decrease the post’s reach by up to 60%. That’s a huge penalty, and it’s just not worth it.
Instead, upload your post with a scroll-stopping image and share your link in the comments instead. Comments are worth their weight in gold on LinkedIn anyway (we’ll get to that in a bit) so it’s a win-win situation.
Equally, using comments strategically can elevate the quality of your posts.
Instead of crowding your caption with a salesy call-to-action, you could end your post in the comments. By default, the first comment is pinned at the start of the comments thread, so it’s a great place for you to add additional information or next steps.
You can see how we’ve done that as part of this post here:
Build trust in the post, convert in the comments.
8. Don’t overlook the hook
David Ogilvy, known as the “Father of Advertising”, is quoted as saying, “When you have written your headline, you have spent eighty cents out of your dollar”. We couldn’t agree more: a strong headline makes or breaks your copy.
In LinkedIn terminology, your headline is your “hook” – the first one to three lines of a post visible before a reader has to click “see more”. If you don’t sufficiently pique an ideal client’s interest, they’re going to scroll right on by, making all the time and effort you might have spent on the rest of the caption worthless.
There are lots of ways to make your hooks impactful.
- Introduce a problem (then give the solution in your post)
- Outline what your post is about (e.g. X ways to do Y)
- Frame the post around a personal story.
9. Repurpose your content
It amazes us how much pushback we get from this one. There’s a widely held misconception that you shouldn’t share content that performed well more than once. Objections include:
- “We’ll sound repetitive!”
- “But we only posted about that the other week!”
- “Our audience will think that we’ve got nothing to talk about!”
Look at it this way. Why do we all know that Nike wants us to “just do it”, or that BMW claim they’re the “ultimate driving machine”? Because they repeat their key messages time and time again. In different ways, yes, which is why learning to say one thing 1000 ways is so powerful.
And, just to hammer home the point, research in 2024 found that, on average, only 19% of your LinkedIn connections will see everything you post.
So failing to repurpose your best-performing content is a huge missed opportunity. You could:
- Turn a text-only post into a video
- Convert a listicle-style post into a carousel
- Break down one long post into several smaller ones.
You can see which of your posts have performed well by heading to your feed and clicking “Post impressions” on the upper left-hand side. From there, you can head into each of the metrics and toggle by date to get a feel for which posts are resonating with your audience.
10. Process is important
There’s no getting around the fact that, when you decide to prioritise LinkedIn, it’s going to be a bit of a slog at first. But having a well-defined process before it becomes a habit will make it easier.
- Write down ideas when they come to you – don’t trust yourself to remember
- Schedule time in your diary for idea generation, writing, and editing
- Steal some of Phil’s posting frameworks to give you a leg up.
Step 3: building your network with the right people
So, your profile is looking good, you’re in the groove of posting regularly… what now?
Well, there’s no point putting out all that fantastic content if the right people aren’t going to see it.
That’s why building your network with existing clients, prospects, and professional connections is so important.
- Increases the number of people who see your posts ✅
- Can open doors and lead to more opportunities ✅
- Larger network = greater authority ✅
Finding the right people
Your existing clients (provided they’re happy with the service you provide!) can be your greatest advocates online. If they’re active on LinkedIn, they’re the most likely to accept your request and engage with your content.
You can ask for their profile URL in review meetings or by email, search for them by name, or encourage them to connect with you through your monthly newsletter.
Next up, professional connections.
Abi reviews her calendar on a Friday and sends a request to everyone she’s spoken to that week. When she attends conferences, she connects with the speakers and everyone she’s chatted with on the way home. If you work with the UK’s highest-rated marketing agency specialising in financial services (that’s us!), you could connect with our team members who you work with.
If you have introducers who regularly send potential clients your way, you should absolutely have them as part of your network. Equally, if there are individuals or firms in your local area who you’d love to work with, sending a connection request can do no harm.
And lastly, potential clients.
There are a few options here. You can search by:
- Company
- University
- Job title
- Location
- A combination of all four.
Let’s say you have a lot of right-fit clients you love working with who are employed by BP or studied at the University of Aberdeen. Open up the relevant LinkedIn company page and, click the tab marked “People” or “Alumni” respectively.

From there, there are a whole host of additional filters, such as what department they work in or what degree they studied for. Click, click, click away, and you’ll be presented with a list of potential connectees.
However, most people will find their ideal clients using the good old search bar.
Lots of advisers/planners we speak to are keen to attract more business owners. So, type that into the search bar, click the People tab, and then click “All filters”.
You’ll see loads of different filters to choose from, including:
- Location
- Current company
- Industry.
Be as specific as you can and click “Show results”. Time to start connecting! Navigate to the profile you’d like to add to your network, and you’ll find a button reading either “Connect” or “Follow” beneath their name and headline. If it says “Follow” but you’d rather send them a connection request, simply hit the “More” button and you’ll find the option there.
Personalising your request
In 2024, LinkedIn made a big change to the way we build our networks. Previously, all users (regardless of whether they were on a Basic or Premium membership) could send up to 200 personalised requests a week.
Now, everyone’s maximum has been reduced to 150-ish per week (LinkedIn wouldn’t give us the exact figure). Premium users can still send all of these with a personalised note. However, Basic users can only send 10 personalised requests, and the rest have to go note-less.
We reckon this is now one of the biggest benefits of Premium (go figure why they made the change). However, if you’re not willing to shell out £50+ a month for Premium Business, make sure your profile is as tailored and impactful as it can be. When you send a blank connection request, the recipient is likely to visit your profile before accepting.
You need to impress!
When putting together a connection request message, which can be a maximum of 300 characters, there are just two things you need to check off:
1. Use the person’s name
If you don’t, it’s like applying for a job without tailoring your CV first. It screams “scattergun approach”. It might be a small addition, but it shows you’ve made a little extra effort (thank you to Phill Agnew for teaching us about effort bias) and will help you stand out.
2. Frame your request in the right way
Nobody wants to receive a sales pitch in their inbox the first time they hear from you. Find some common ground, compliment a recent post of theirs, thank them for interacting with a post of yours. Do whatever you need to do to really personalise the request and show a genuine interest in being a part of their network.
There’s no need to overthink it. Finding a simple formula that works for you means:
- You’ll send more connection requests per week, because it’s not a chore
- The requests will be well-received, so more people are likely to accept
- If you’re inviting the right people, they’ll be excited by your content.
All resulting in an engaged network who are more likely to; interact with your posts, see the value in what you do, and be receptive to a chat about how you could work together when the time is right.
If your profile is tailored to your ideal clients, you might find the “Who’s viewed your profile” feature hugely valuable in growing your network too.
Users with a Basic account can see the five most recent viewers in the last 90 days, and Premium users can see the full list (except the names of people browsing in private mode). Open your profile and, just above your About section, you’ll see a link to view your profile viewers.
If a person is on that list, they’ve already taken a look at your profile, so they’ll likely be more receptive to a connection request.
Step 4: engaging with others to create meaningful relationships
The final step to LinkedIn success (and often the most overlooked) is engaging.
Posting top-quality content and inviting people into your network is great, but without engaging, you’re in broadcast mode. “Posting and ghosting”, some say.
Engaging simply means actively interacting with content on the platform by reacting to, commenting on, or reposting updates posted by others.
Relationships are a two-way street. If you never show an interest in your ideal clients’ content, why should they show an interest in yours? Financial advice/planning is an intimate process which requires trust and authority. Taking the time to engage on LinkedIn helps build both of those things before you even start working with someone.
So, whether you simply scroll your feed for interesting content, or go one step further by bookmarking potential clients you’d really like to nurture, you can do one of three things:
Commenting
Yes, this list is in order of priority. Commenting is the king of engagement.
The algorithm favours comments over reposting and reacting, leading to increased visibility for you as the commenter, and the original post itself. Posts receiving many comments are prioritised by the algorithm and therefore shown to a wider audience.
It also comes back to that concept of effort bias – commenting takes more time and effort than reacting. Having said that, comments don’t need to be perfect – they just need to resonate. And it’s blatantly obvious when someone has used AI to generate a comment for them, so get human!
- Commenting “great post 👍” doesn’t help anyone
- Start a conversation by following up with a question
- Personalise the comment where you can (e.g. use their name)
- If the post has reminded you of a book or podcast, share it with them.
But, if you find leaving a comment intimidating, you can always start here for now…
Reacting
Arguably the easiest form of engagement. Previously, “reacting” meant “liking” but, as of 2019, we can express a range of LinkedIn-shaped emotions – like, celebrate, support, love, insightful, and funny respectively.

It’s absolutely better than nothing (and arguably better than reposting), but it doesn’t open up that all-important conversation in the same way that commenting does.
Reposting
You have two options: repost with your own thoughts, or repost immediately.
Reposting with your own thoughts means adding your own caption to accompany the original post. If you repost immediately, the post will be pushed out to your audience without any additional commentary from you.
But there’s a problem. In early 2024, Abi spoke to LinkedIn and they confirmed: “Duplicates are hidden in the feed”. It makes sense. LinkedIn is a business, so they want to do anything they can to keep you on platform. If you’re constantly seeing the same post in your feed, it’ll quickly feel boring and repetitive. Goodbye LinkedIn, hello Facebook.
The research backs up our own experience: reposting isn’t a predictably powerful way of supporting your ideal clients’ content. That isn’t to say it won’t work, we just haven’t seen it work well consistently.
Instead, you could support the original author by writing your own post in response to theirs and tagging them in it. However, our recommendation is simpler than that: leave a comment.
There’s one thing we haven’t touched on: direct messaging (DM).
Much like with personalised connection requests, it’s important not to open with a hard sell, and instead find some mutual ground.
- Did you both attend the same event? This might be true of a professional connection
- After looking through their posts, do you share a common interest?
- Have they posted something you found interesting?
Whatever it is, always lead with a genuine conversation and earn the right to sell. This might be a drawn-out process with several DMs over weeks or months. But, by staying front of mind, it’s you they are more likely to think of when the time is right for financial advice/planning.
4 steps to make LinkedIn work as hard as you do
There are four key things to take away from this definitive guide:
Profile: a strong profile builds trust, communicates your value, and attracts right-fit potential clients – first impressions count.
Posting: showing up consistently with posts that educate, inspire, and showcase your expertise is impressive – you’ll stay front of mind.
Connecting: grow your network strategically and with a clear purpose to amplify your reach – quality teamed with quantity.
Engaging: build more meaningful relationships through authentic, thoughtful interactions – don’t just be seen, make others feel heard.
A helping hand
If this all sounds great, but you don’t have the time, skill, or inclination to optimise your LinkedIn presence, our social media team can help.
They have years of experience working with financial advisers/planners who understand the power of LinkedIn but are too busy changing their clients’ lives to give the platform the energy it deserves. Our team will optimise your profile, share regular value-adding posts, expand your network with the right people, and engage with potential clients on your behalf.
Equally, they can deliver bespoke in-house training, upskilling your team with the tools they need to harness the opportunities that LinkedIn can (and does) provide, or run a paid social media campaign on a variety of platforms, including Meta and LinkedIn.
And, for our clients already signed up to a blogs/newsletter package with us, you can append an affordable social media add-on to that service. We’ll repurpose the blog content on your website into bitesize, engaging posts and share them directly to your profile(s) or page(s), redirecting visitors to your website to read more.
Email hi@theyardstickagency.co.uk or call the office on 0115 896 5300 and schedule time for a chat with our client engagement manager, Abi Robinson. As someone who has grown her own LinkedIn from 200 connections to 4,000 followers in just three years, you’ll be in good hands. You can also use her profile as an opportunity to hone your connection request sending skills before trying it out on potential clients!
Above all else, if you can master the four basics outlined in this guide and stay consistent with them, you’ll reveal the enormous potential LinkedIn has to grow your business.
PS. If you’ve enjoyed this free definitive guide, please consider leaving us a Google review by clicking the link here. It should only take you a couple of minutes, it helps us improve our guides in the future, and we’d be very grateful!

Abi Robinson
Head of Client Engagement